- Also Check: Display Recent Posts Inside Vertical Slider
Today's recent posts slider is coded using the same logic with which we coded our last JSON widget except for few design differences. Please check the last widget also:
Also read our json series to learn how to code these gadgets yourself!
Unique Features of Blogger Recent Posts Slider
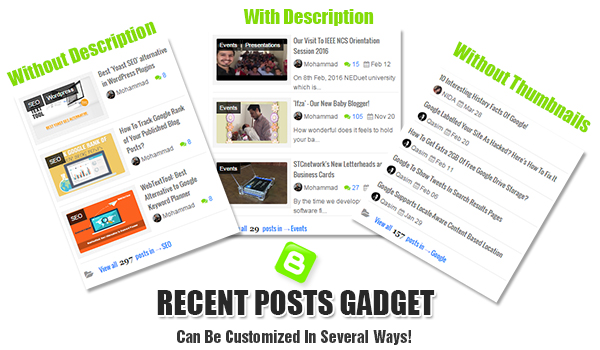
Today's recent posts widget has some unique features introduced first time online :
- Author Avatar - Unique!
- Displays recent posts inside Dynamic Slider or as a Dynamic Flat list. - Unique!
- Displays recent posts from a specific category/label.
- Slider with two animations: Slide & Fade
- Clickable Comments Count
- Custom Date Format in ribbon fashion - Unique!
- Clickable Animated Featured Thumbnails - Unique!
- Option to increase or decrease thumbnail Resolution - Unique!
- Support for Third-party Images and YouTube thumbnails - Unique!
- Title Length is adjustable
Add Recent Posts Slider Widget in Blogger
Follow these easy steps to add recent posts slider to your blogspot blog:
- Go To Blogger > Template
- Backup your template
- Click "Edit HTML"
- Just below
<head>tag paste the following JS and CSS source links:<script src='http://ajax.googleapis.com/ajax/libs/jquery/1/jquery.min.js' type='text/javascript'></script>
<link href='http://fortawesome.github.io/Font-Awesome/assets/font-awesome/css/font-awesome.css' rel='stylesheet'/>
<link href='http://fonts.googleapis.com/css?family=Oswald' rel='stylesheet' type='text/css'/>
<link href='https://cdnjs.cloudflare.com/ajax/libs/flexslider/2.6.1/flexslider.min.css' rel='stylesheet' type='text/css'/>
<script src='https://cdnjs.cloudflare.com/ajax/libs/flexslider/2.6.1/jquery.flexslider.min.js' type='text/javascript'></script>Note: Do not add JQuery, FontAwesome or Oswald links in the code above to your template if you are already using them on your site.
- Next search
]]></b:skin>and just above it paste the following code:<style>
/*######### Recent Posts Slider Stylesheet #############*/
.mbtslides-title{font-family:oswald; font-weight:normal;font-size:18px!important; border-bottom:2px solid rgb(144, 241, 40); color:#242729; width:300px;}.flexslider{ width:300px; margin:0px; border:0;}
.flexslider .slides {list-style-type:none; margin:0px auto 10px auto;padding:0px;} .flexslider li {color:#666; font-family:helvetica; font-size:12px; overflow:hidden; position:relative; padding-top: 10px; line-height: 1.6em;} .flexslider .flex-control-nav{list-style:none outside none;position:absolute;top:-45px;right:5px;text-align:right;height:10px}
.flexslider .flex-control-nav li{display:inline-block;margin:0 2px}
.flexslider .flex-control-nav a{text-indent:9999px;display:block;width:10px;cursor:pointer;height:10px;background-color:#000;border:1px solid #000;border-radius:0!important}
.flexslider .flex-control-nav a.flex-active{background-color:rgb(132, 219, 6);border:1px solid rgb(144, 241, 40)} .flexslider .flex-div{margin:0px auto 20px auto; display:block; border-bottom:1px solid #eee; padding-bottom:20px!important; position:relative;} .flexslider li a { color:#0080ff; text-decoration:none; } .flexslider i{color:#999; padding-right:5px; } .flexslider .iline{line-height:2em; margin-top:3px;} .flexslider .icontent{line-height:1.5em; margin-top:5px;} .flexslider div span{margin:0 5px 0 0; display:inline-block;font-weight: normal; } .flexslider .mbttitle {font-family:oswald; font-size:13px; color:#666; font-weight:normal; text-decoration:none;} .flexslider .mbttitle:hover, .flexslider .itotal a:hover {color:#333; text-decoration:none;}
.flexslider .iedit a{text-decoration:none; color:#999; cursor:pointer}
.flexslider .iedit:before, .flexslider .iauthor:before, .flexslider .itag:before, .flexslider .icomments:before, .flexslider .idate:before, .flexslider .itotal span:before{font-family:fontAwesome; position:relative; padding-right:8px; color:#999;} .flexslider .iauthorpic{width: 17px!important;height: 17px!important;border-radius: 50%; float: none; display: inline-block!important; margin:0px 0px 0px 0px; padding-right:3px; position:relative; top:3px;}
.flexslider .iFeatured{overflow:hidden;position:relative;float:left;margin:0 5px 10px 0;padding:0;} .flexslider .iFeatured a {background: none; padding:0px; display: block;border:1px solid #eee;} .flexslider .iFeatured img{width:110px!important;height:65px!important;-moz-transition:all .3s;-webkit-transition:all .3s;transition:all .3s; border-radius: 2px;} .flexslider .iFeatured:hover img{ opacity:1; -moz-transform:scale(1.4);-webkit-transform:scale(1.4);transform:scale(1.4)} .flexslider .icomments a{color:#0080ff; font-family: arial;font-size:12px;} .flexslider .icomments a:hover{text-decoration:underline} .flexslider .icomments:before {content:'\f086'; padding:0px 3px 0px 7px; color:#84DB06;} .flexslider .idate {position: absolute;left: 0px;top: -7px; background: rgb(132, 219, 6);color: #fff;padding: 3px 4px;font-family: oswald;font-size: 11px;border: 1px solid rgb(144, 241, 40);} .flexslider .idate div{width:18px; line-height:1.6em; text-align:center;}
.flexslider .idate:after {content: ' ';position: absolute;z-index:-9999px;width: 0;height: 0;left: 25px;top: -1px;border-width: 4px 6px;border-style: solid;border-color: transparent transparent rgb(125, 208, 4) rgb(125, 208, 4);}</style>
Make these changes
- To change the green color theme of the slider simply replace the green highlighted color codes with color of your choice. The color can be in rgb or #hexadecimal, both work. Use our Color Code Generator.
- Save your template.
- Now go to Blogger > Layout
- Select "Add a Gadget"
- Choose "HTML/JavaScript" gadget
- Keep the title field empty and then paste the following code inside it:
<script type="text/javascript">
$(window).load(function() {
$('.flexslider').flexslider({
animation: "slide",
directionNav: false,
touch: true,
slideshowSpeed: 2500,
pauseOnHover: true,
animationSpeed: 700,
});
});
</script>
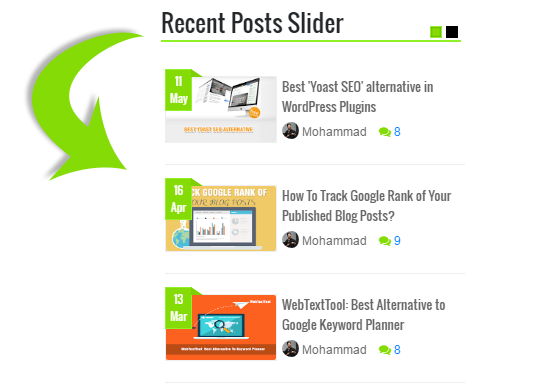
<h2 class="mbtslides-title">Recent Posts Slider</h2>
<div class="flexslider">
<ul class="slides"><script type="text/javascript">
//################### Defaults
var ListBlogLink = "http://mybloggertricks.com";
var ListCount = 6;
var ListLabel = "SEO";
var TitleCount = 66;
var ImageSize = 150;
//################### Function Start
function mbtslider(json) {
for (var i = 0; i < ListCount; i++)
{
//################### Variables Declared
var listing= ListImage = ListUrl = ListTitle = ListImage = ListContent = ListConten = ListAuthor = ListTag = ListDate = ListUpdate = ListComments = thumbUrl = TotalPosts = sk = AuthorPic= ListMonth = Y = D = M = m = YY = DD = MM = mm = TT = "";//################### Category
if (json.feed.entry[i].category != null)
{
for (var k = 0; k < json.feed.entry[i].category.length; k++) {
ListTag += "<a href='"+ListBlogLink+"/search/label/"+json.feed.entry[i].category[k].term+"'>"+json.feed.entry[i].category[k].term+"</a>";
if(k < json.feed.entry[i].category.length-1)
{ ListTag += " ";}
}
}//################### URL
for (var j = 0; j < json.feed.entry[i].link.length; j++) {
if (json.feed.entry[i].link[j].rel == 'alternate') {
break;
}
}
ListUrl= "'" + json.feed.entry[i].link[j].href + "'";//################### Info
TotalPosts = json.feed.openSearch$totalResults.$t;
if (json.feed.entry[i].title!= null)
{
ListTitle= json.feed.entry[i].title.$t.substr(0, TitleCount);
}
if (json.feed.entry[i].thr$total)
{
ListComments= "<a href='"+json.feed.entry[i].link[j].href+"#comment-form'>"+json.feed.entry[i].thr$total.$t+"</a>";
}
ListAuthor= json.feed.entry[i].author[0].name.$t.split(" ");
ListAuthor=ListAuthor.slice(0, 1).join(" ");AuthorPic = json.feed.entry[i].author[0].gd$image.src;
//################### Date Format
ListMonth= ["Jan", "Feb", "Mar", "Apr", "May", "Jun", "Jul", "Aug", "Sep", "Oct", "Nov", "Dec"];
ListDate= json.feed.entry[i].published.$t.substring(0,10);
Y = ListDate.substring(0, 4);
m = ListDate.substring(5, 7);
D = ListDate.substring(8, 10);
M = ListMonth[parseInt(m - 1)];ListUpdate= json.feed.entry[i].updated.$t.substring(0, 16);
YY = ListUpdate.substring(0, 4);
mm = ListUpdate.substring(5, 7);
DD = ListUpdate.substring(8, 10);
TT = ListUpdate.substring(11, 16);
MM = ListMonth[parseInt(mm - 1)];//################### Thumbnail Check
// YouTube scanif (json.feed.entry[i].content.$t.match(/youtube\.com.*(\?v=|\/embed\/)(.{11})/) != null)
{var youtube_id = json.feed.entry[i].content.$t.match(/youtube\.com.*(\?v=|\/embed\/)(.{11})/).pop();
if (youtube_id.length == 11) {
var ListImage = "'//img.youtube.com/vi/"+youtube_id+"/0.jpg'";
}
}else if (json.feed.entry[i].media$thumbnail)
{
thumbUrl = json.feed.entry[i].media$thumbnail.url;
sk= thumbUrl.replace("/s72-c/","/s"+ImageSize+"/");
ListImage= "'" + sk.replace("?imgmax=800","") + "'";
}else if (json.feed.entry[i].content.$t.match(/src=(.+?[\.jpg|\.gif|\.png]")/) != null)
{
// Support For 3rd Party Images
ListImage = json.feed.entry[i].content.$t.match(/src=(.+?[\.jpg|\.gif|\.png]")/)[1];
}else
{
ListImage= "'https://blogger.googleusercontent.com/img/b/R29vZ2xl/AVvXsEgtm0maNUr06C_jCvhDoLUkVnptgdxcrDZZu6uXi9IGh6IreJpMcY7Vcs4HP-ynBx46v8dBcA6Lk4Jhoy0TGbObxeJt3O6fnk1iWw1OAgEOBPQZQBEosJkkxc6iVuTMKCMa70UGC7-K9Do/s200/Icon.png'";
}//################### Printing List
var listing = "<div class='flex-div'><div class='iFeatured'><a href="
+ ListUrl+
"><img src="
+ListImage+
"/></a></div><a class='mbttitle' href="
+ListUrl+
"target='_blank'>"
+ListTitle+
"</a><div class='iline'><span class='iauthor'><img class='iauthorpic' src='"+AuthorPic+"'/>"
+ListAuthor+
"</span><span class='icomments'>"
+ListComments +
"</span> <span class='idate'><div>"
+ D +
"</div><div> "
+ M +
"</div></span></div></div>";
if (i == 0)
document.write('<li>');
if (i < ListCount/2)
document.write(listing);
if (i == ListCount/2)
document.write('</li><li>');
if (i >= ListCount/2)
document.write(listing);
if (i == ListCount)
document.write('</li>');
} }<!-- #### Invoking the Callback Function #### -->
document.write("<script src='"+ListBlogLink+"/feeds/posts/default/-/"+ListLabel+"?alt=json-in-script&callback=mbtslider'></"+"script>");
</script>
</ul></div>The following control options will help you modify the widget:
- animation: Select your animation type, "fade" or "slide"
- slideshowSpeed: You can set the speed of the slideshow cycling, in milliseconds
- animationSpeed: You can also set the speed of animations, in milliseconds
- pauseOnHover: Pause the slideshow when hovering over slider, then resume when no longer hovering
- You can edit the widget title by editing: Recent Posts Slider
- If you don't want to use the title then delete the yellow highlighted code.
- ListBlogLink : Insert your Blog link here
- ListCount : Decide how many posts do you wish to display. Choose even integer only like 2,4,6,8,10 etc.
- ListLabel : Insert your blog label/category here. Remember that labels are case sensitive. Therefore type it exactly as it is shown in your browser address bar. If your label is "blogging tips" and if you type it as "Blogging Tips" then it wont work. You must make sure that all letters are written in correct cases.
- TitleCount : Choose how many characters to display in post title.
- ImageSize : You can control the resolution or aspect ratio of thumbnails by editing ImageSize = 150; where the value 150 means that you want your images to be within 150 x 150 pixels in size. Keep this value close to the thumbnail size to ensure website load time is not effected a lot. Since our thumbnail images have a width of about 110px, therefore I have kept the resolution as 150, slightly higher to display images in slightly good quality.
- If you want to show recent posts published on your blog but don't wish to display posts from a specific label then simply remove /-/"+ListLabel+" from the code above.
- Click Save and you are all done!
Display Dynamic Slider or Just a Flat List!
Fortunately I have setup the logic such that you can choose whether to display your posts inside animated FlexSlider or display them as simple flat list similar to my earlier recent posts widget. In other words you can choose to enable or disable the FlexSlider.
How to enable or disable the flex slider?
The logic is extremely simple.
If you want to display and enable FlexSlider then insert even integer value next to ListCount , such as 2,4,6,8,10,12 etc. The JavaScript logic above will divide your inserted value into two sections and will display posts in each slide accordingly.
Output will be such:

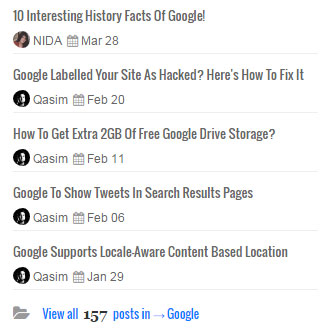
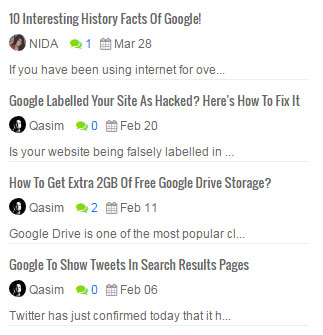
For displaying a dynamic Flat list or in other words to disable FlexSlider insert odd integer value next to, such as 1,3,5,7,9,11 etc.
Output will be such:

Wasn't that easy? =)
Let me know if you have any questions or if you need any assistance. I hope this new widget will take your blogspot blog to the next level and help you spice up your blog with one more unique widget which was formerly found only on wordpress blogs. Why Should Wordpress folks have all the fun! =)
 Blogger Recent Posts Gadget with label support is the backbone behind fancy templates being designed these days. We have covered a detailed full series on how these widgets are coded using


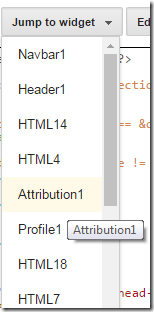
 There are two standard ways to remove Blogger Attribution Gadget. The First one uses simple CSS to hide the text "Powered by Blogger", the second recommended method simply deletes the Attribution Gadget from your BlogSpot layout. We will discuss both in detail today.