Why Blogspot Gives Two Description Fields To Edit?

two description fields in blogspot blogs


Blogger dashboard settings allow users to change the description of the blog twice once under the "Basic" option and next under "Search Preferences > Meta Tags" option. Blogspot users often find it confusing to understand the purpose behind each of these description boxes. We will discuss in detail the basic difference between each of these description boxes.

Purpose of Blog Description Field Under "Basic" Option

You can edit this description of the blog by going to Blogger > Settings > Basic : Basic.

blogspot description box

Description under Basic option is your front-end description of the blog that is shown as text under your Blog Title inside the Header section. You can call it as your blog punch line, blog slogan or a brief blog description. It must be short and precise, not longer than 3-4 words which could be your targeted keywords also. .

Note: It is not your meta description that is displayed in search results. It is your front-end textual blog description that is shown to your blog visitors. You can choose to display this description or hide it. It has no SEO value compared to meta description that we will discuss later in this post.

In our case it is "Transforming Bloggers Into Entrepreneurs"

blogspot description below blog title

Purpose of Description Field Under "Meta Tags" Option

You can edit this description of the blog by going to Blogger > Search preferences > Meta tags: Description.

blogspot meta description box

This your blog's Meta Description that gives search robots a brief introduction of your blog in no more than 150 characters. This is not shown to your blog visitors but is added inside the template source file. Visit your blog and click "Ctrl + U" to view source. Search for "Description" and you will see the meta description HTML tag as shown below:

blogspot meta description box

I have created several tools for creating SEO friendly meta description tags which you can try below:

By default blogger shows your blog meta description inside all your blog posts, static pages and archive/search pages. As a result of this two meta description tags are created on your source page. Once for the blog homepage and once for the post description (description you type in blogger editor: search option). To counter this problem read the following post where I have suggested a perfect solution:

If you can't see a meta description option for your blog posts in the editor then please read this post:

I hope this post may have cleared your confusion on what exactly is the difference between each of these description fields. Let me know if you have any questions. Peace buddies =)

Most Dynamic Random Posts Widget For Blogger

Random Posts Widget For Blogger
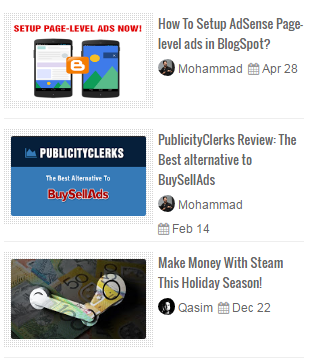
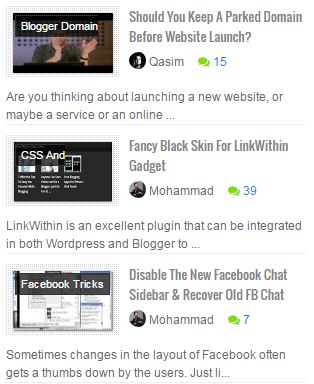
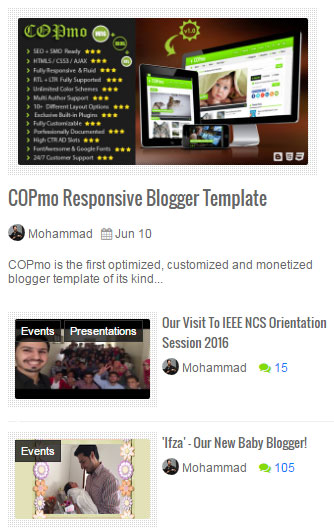
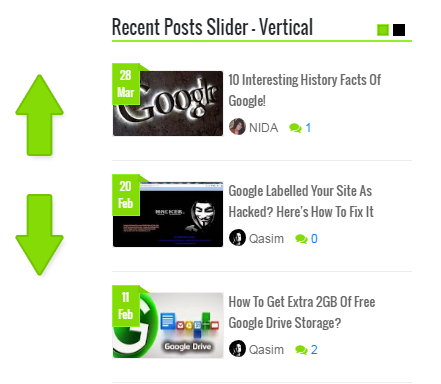
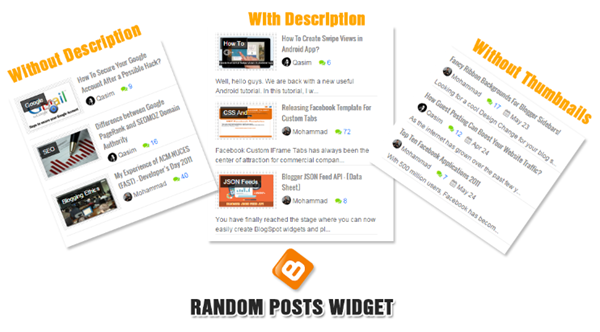
Blogger random posts widget shows a random list of your blog posts with thumbnails, title, comments count, date, label tag and author avatar. It is really important to send traffic to your old posts and keep highlighting them. Random Posts gadget helps your readers to take a quick look at some of the older posts that they might have missed reading. It attracts readers attention towards oldest posts thus helping you with increased pageviews and higher revenue. This widget displays both label links and author avatar which are the two features first time introduced for blogspot blogs and thus makes this widget extremely unique. It is built using Blogger JSON Feeds technique that we have discussed in detail.

DEMO: Look at the right sidebar of MBT blog

Tabbed Random Posts Widget

Random Posts Widget Features

Random Posts widget has some unique features introduced first time online :

  1. Author Avatar - Unique!
  2. Clickable Comments Count
  3. Shows Post Labels - Unique!
  4. Custom Date Format
  5. Clickable Animated Featured Thumbnails - Unique!
  6. Option to increase or decrease thumbnail Resolution - Unique!
  7. Support for Third-party Images and YouTube thumbnails - Unique!
  8. Title Length is adjustable

Add Random Posts Widget To Blogger

Follow the steps below to install random posts widget on a blogspot blog:

  1. Go To Blogger > Template
  2. Backup your template
  3. Click "Edit HTML"
  4. Just below <head> tag paste the following CSS source links:

    <link href='http://fortawesome.github.io/Font-Awesome/assets/font-awesome/css/font-awesome.css' rel='stylesheet'/>
    <link href='http://fonts.googleapis.com/css?family=Oswald' rel='stylesheet' type='text/css'/>

  5. Next search ]]></b:skin> and just above it paste the following code:

    /*######## Random Posts Widget By STCnetwork.org ########*/
    .mbtlist {list-style-type:none;overflow:hidden; margin: 10px 0px 0px 10px!important; width:300px; padding:0px!important;}
    .mbtlist li {margin:0px auto 10px auto; clear:both; color:#666; font-family:helvetica; font-size:12px; border-bottom:1px solid #eee; overflow:hidden; position:relative}
    .mbtlist li a { color:#666; text-decoration:none; }
    .mbtlist i{color:#999; padding-right:5px; }
    .mbtlist .iline{line-height:2em; margin-top:3px;}
    .mbtlist .icontent{line-height:1.5em; margin-top:5px; clear:both}
    .mbtlist div span{margin:0 7px 0 0; display:inline-block;font-weight: normal; }
    .mbtlist .mbttitle {font-family:oswald; font-size:13px; color:#838383; font-weight:normal; text-decoration:none;}
    .mbtlist .mbttitle:hover, .mbtlist .itotal a:hover  {color:#333; text-decoration:none;}
    .mbtlist .iedit a{text-decoration:none; color:#999; cursor:pointer}
    .mbtlist .iedit:before, .mbtlist .iauthor:before, .mbtlist .itag:before, .mbtlist .icomments:before, .mbtlist .idate:before, .mbtlist .itotal span:before{font-family:fontAwesome; position:relative; padding-right:8px; color:#999;}
    .mbtlist .iauthorpic{width: 17px;height: 17px;border-radius: 50%;
    float: none; display: inline-block; margin:0px 0px 0px 0px; padding-right:3px; position:relative; top:3px;}
    .mbtlist .itag{    color: #fff;position: absolute;left: 9px;top: 9px;display: inline-block;font-size: 11px;width: 100px; height:22px;    overflow: hidden;}
    .mbtlist .itag a{background:#000;background:rgba(0,0,0,0.7);text-decoration:none;color:#fff;padding:4px 5px;text-transform:capitalize;line-height: 2em;font-family: arial;font-size: 11px;border:1px solid #333;}
    .mbtlist .itag a:hover{background:#84DB06;border: 1px solid #84DB06; color:#fff; text-decoration:none;}
    .mbtlist .iFeatured{overflow:hidden;position:relative;float:left;margin:0 10px 10px 0;padding:0;}
    .mbtlist .iFeatured a {background: url(https://blogger.googleusercontent.com/img/b/R29vZ2xl/AVvXsEhQY8Lc14nNe-JPwokXc3EGiv40u4ZwXakG4TbbrRQprNp3D8n6Ft4-kAveTtJLm0y7DcZukyJdWzaJPZFaWx-wEwktTuRy0r_HMsWqJHFpz2y1VZtTplp786JhEMMH-w1qEIVb0dqTEl0/s100/mbt-bg1.png) 0 0;padding:6px 5px 4px 6px;display: block;}
    .mbtlist .iFeatured img{width:100px;height:60px;-moz-transition:all .3s;-webkit-transition:all .3s;transition:all .3s;    border: 1px solid #ddd;       border-radius: 2px;}
    .mbtlist .iFeatured:hover img{ opacity:1; -moz-transform:scale(1.4);-webkit-transform:scale(1.4);transform:scale(1.4)}
    .mbtlist .icomments a{color:#0080ff; font-family: arial;font-size:12px;}
    .mbtlist .icomments a:hover{text-decoration:underline}
    .mbtlist .icomments:before {content:'\f086'; padding:0px 3px 0px 7px; color:#84DB06;}
    .mbtlist .idate:before {content:'\f073';padding-right:4px}
    .mbtlist .iedit:before {content:'\f040';}
    .mbtlist .imore {font-size:16px; font-weight:bold; text-decoration:none; color:#666;}
    .mbtlist .itotal {color:#999;  padding:5px 0px; }
    .mbtlist .itotal a {font-family:"Droid Sans"; font-size:12px; font-weight:normal; color:#999; text-decoration:none}
    .mbtlist .itotal span:before {content:'\f07c';}
    .mbtlist .itotal span font {padding:0px 3px; color:#333; font-family:droid sans; font-size:15px; font-weight:bold}

  6. Save your template.
  7. Now go to Blogger > Layout
  8. Select "Add a Gadget"
  9. Choose "HTML/JavaScript" gadget
  10. Paste the following code inside it:

    <script type='text/javaScript'>
    //#################### Defaults
    var ListBlogLink = "http://mybloggertricks.com";
    var ListCount = 3;
    var ChrCount = 85;
    var TitleCount = 70;
    var ImageSize = 150;
    var showcomments = "on";
    var showdate = "off";
    var showauthor = "on";
    var showthumbnail = "on";
    var showlabel = "on";
    var showcontent = "off";

    var RandomArray = [];
    var TotalPosts  = 0;
    var RandomArray = new Array(ListCount);

    function TotalCount(json) {
        TotalPosts   = json.feed.openSearch$totalResults.$t
    }
    document.write('<script type=\"text/javascript\" src=\"http://www.mybloggertricks.com/feeds/posts/default?alt=json-in-script&callback=TotalCount\"><\/script>');

    function GenerateNum() {
        for (var i = 0; i < ListCount ; i++) {
        for (var j = 0; j < RandomArray.length; j++){
        var RandomNum = Math.floor(Math.random() * (TotalPosts ) + 1);
        RandomArray[i] = RandomNum; }
                                                                      }
    }
    </script>
    <script type='text/javaScript'>

    document.write('<ul class="mbtlist">');
    //################ Function Start
    function mbtrandom(json) {
    for (var i = 0; i < ListCount; i++)
    {
      
    //################### Variables Declared
    var listing= ListImage = ListUrl = ListTitle = ListImage = ListContent = ListConten = ListAuthor = ListTag = ListDate = ListUpdate = ListComments = thumbUrl = TotalPosts = sk = AuthorPic= ListMonth = Y = D = M = m = YY = DD = MM = mm = TT =  "";

    //################### Category
    if (json.feed.entry[i].category != null)
    {
    for (var k = 0; k < json.feed.entry[i].category.length; k++) {
    ListTag += "<a href='"+ListBlogLink+"/search/label/"+json.feed.entry[i].category[k].term+"'>"+json.feed.entry[i].category[k].term+"</a>";
    if(k < json.feed.entry[i].category.length-1)
    { ListTag += " ";}
    }
    }

    //################### URL
    for (var j = 0; j < json.feed.entry[i].link.length; j++) {
          if (json.feed.entry[i].link[j].rel == 'alternate') {
            break;
          }
        }
    ListUrl= "'" + json.feed.entry[i].link[j].href + "'";

    //################### Info
    TotalPosts = json.feed.openSearch$totalResults.$t;
    if (json.feed.entry[i].title!= null)
    {
    ListTitle= json.feed.entry[i].title.$t.substr(0, TitleCount);
    }
    if (json.feed.entry[i].thr$total)
    {
    ListComments= "<a href='"+json.feed.entry[i].link[j].href+"#comment-form'>"+json.feed.entry[i].thr$total.$t+"</a>";
    }
    ListAuthor= json.feed.entry[i].author[0].name.$t.split(" ");
    ListAuthor=ListAuthor.slice(0, 1).join(" ");

    AuthorPic = json.feed.entry[i].author[0].gd$image.src;
    //################### Content Check

    ListConten = json.feed.entry[i].content.$t;
    ListContent= ListConten.replace(/(<([^>]+)>)/ig,"").substring(0, ChrCount);

    //################### Date Format

    ListMonth= ["Jan", "Feb", "Mar", "Apr", "May", "Jun", "Jul", "Aug", "Sep", "Oct", "Nov", "Dec"];

    ListDate= json.feed.entry[i].published.$t.substring(0,10);

                             Y = ListDate.substring(0, 4);
                            m = ListDate.substring(5, 7);
                             D = ListDate.substring(8, 10);
                             M = ListMonth[parseInt(m - 1)];                       

    ListUpdate= json.feed.entry[i].updated.$t.substring(0, 16);

                             YY = ListUpdate.substring(0, 4);
                            mm = ListUpdate.substring(5, 7);
                             DD = ListUpdate.substring(8, 10);
                             TT = ListUpdate.substring(11, 16);
                             MM = ListMonth[parseInt(mm - 1)];   

    //################### Thumbnail Check
    // YouTube scan

    if (json.feed.entry[i].content.$t.match(/youtube\.com.*(\?v=|\/embed\/)(.{11})/) != null)
    {

        var youtube_id = json.feed.entry[i].content.$t.match(/youtube\.com.*(\?v=|\/embed\/)(.{11})/).pop();
       
        if (youtube_id.length == 11) {
            var ListImage = "'//img.youtube.com/vi/"+youtube_id+"/0.jpg'";
            }
    }

    else if (json.feed.entry[i].media$thumbnail)
    {
    thumbUrl = json.feed.entry[i].media$thumbnail.url;
    sk= thumbUrl.replace("/s72-c/","/s"+ImageSize+"/");
    ListImage= "'" + sk.replace("?imgmax=800","") + "'";
    }

    else if (json.feed.entry[i].content.$t.match(/src=(.+?[\.jpg|\.gif|\.png]")/) != null)
    {
    // Support For 3rd Party Images
    ListImage =  json.feed.entry[i].content.$t.match(/src=(.+?[\.jpg|\.gif|\.png]")/)[1];
    }
    else
    {
    ListImage= "'https://blogger.googleusercontent.com/img/b/R29vZ2xl/AVvXsEgtm0maNUr06C_jCvhDoLUkVnptgdxcrDZZu6uXi9IGh6IreJpMcY7Vcs4HP-ynBx46v8dBcA6Lk4Jhoy0TGbObxeJt3O6fnk1iWw1OAgEOBPQZQBEosJkkxc6iVuTMKCMa70UGC7-K9Do/s200/Icon.png'";
    }
    //################### Printing List

    document.write( "<li style='margin:0px auto 10px auto!important; padding:0px!important;' class='node"+[i]+"' >");
    if (showthumbnail == 'on'){
    document.write("<div class='iFeatured'><a  href="
    + ListUrl+
      "><img src="
    +ListImage+
    "/></a></div>");
    }

    if (showlabel == 'on'){
    document.write("<span class='itag'>"
    +ListTag +
    "</span>");
    }

    document.write("<a class='mbttitle' href="
    + ListUrl+
    ">"
    + ListTitle+
    "</a><div class='iline'>");

    if (showauthor == 'on'){
    document.write("<span class='iauthor'><img class='iauthorpic' src='"+AuthorPic+"'/>"
    +ListAuthor+
    "</span>");
    }
    if (showcomments == 'on'){
    document.write("<span class='icomments'>"
    +ListComments +
    "</span> ");
    }

    if (showdate == 'on'){
    document.write("<span class='idate'>"
    + M +
    " "
    + D +
    "</span>");
    }


    document.write("</div>");

    if (showcontent == 'on'){
    document.write("<div class='icontent'>"
    +ListContent +
    "...</div> ");
    }
    document.write("</li>");

    }
    document.write("<div class='itotal'><span> <a href='"+ListBlogLink+"'>View all <font>"+TotalPosts+"</font> posts in  -  "+ListLabel+" </a></span></div>");
    }

    <!-- ######### Invoking the Callback Function ######## -->
    for (var i = 0; i < ListCount ; i++) {
    GenerateNum();

        document.write('<script type=\"text/javascript\" src=\"http://www.mybloggertricks.com/feeds/posts/default?alt=json-in-script&start-index=' + RandomArray[i] + '&max-results=1&callback=mbtrandom\"><\/script>')
    };
    document.write('</ul>');
    </script>

  11. You can easily choose to show or hide an option using on/off Boolean values. Simple make these settings:
    • Replace http://mybloggertricks.com with your Blog URL. It appears thrice.
    • Mention number of posts to display in ListCount = 3;
    • Edit ChrCount = 90; to choose how many characters you wish to display in post description.
    • Edit TitleCount = 70; to choose post title length.
    • You can control the resolution or aspect ratio of thumbnails by editing ImageSize = 150; where the value 150 means that you want your images to be within 150 x 150 pixels in size. Make sure to keep this value close to the image size to ensure website load time is not effected a lot. Since our thumbnail images have a width of about 100px, therefore I have kept the resolution as 150, slightly higher to display images in slightly good resolution.
    • To show an element simply choose on and to hide it choose off. You apply these switch on/off values to these 6 variables: showcomments, showdate, showauthor, showthumbnail, showlabel, showcontent
  12. Click Save and you are all done!

Visit your blog to see a random post widget exactly like the one below:

Random Posts Widget For Blogger

Customize Random Posts Widget

By simply changing on/off values you can change the entire layout of the random posts gadget. Let me show you some examples:

1 Switching off showcontent and showdate will produce this look:

Random Posts Widget For Blogspot

2 Switching off showcontent, showlabel and showcomments will produce this look:

Random Posts Gadget For Blogspot

3 Switching off showcontent, showthumbnail, showcomments and showlabel will produce this look:

Blogger Random Posts Widget

4 Switching off showthumbnail and showlabel will produce this look:

Simple List of Random Posts in Blogger

5 Switching everything on will produce this layout:

Random Posts Widget with Content

6 Each "li" tag has its own class (such as .node0, .node1, .node2, etc.) that you can use to customize the look and appearance of each list. By changing these styles you can display recent posts in several interesting layouts such as:

Vertical List of Random Posts With Large Thumbnail at Top:

Vertical List of Random Posts Gadget With Animated Thumbnails

Horizontal List of Random Posts With Large Side Thumbnail:

Horizontal List of Random Posts Widget With Thumbnails

This is the exact same technique that I used to design COPmo template.

Coming Next: Random Posts Slider!

I hope you may find the above widget useful and unique. In our coming tutorials our focus will be to display random posts inside a vertical or horizontal flexslider. Let me know if you need any help or assistance. Peace buddies =)

Vertical Slider For Showing Blogger Recent Posts

Vertical Slider Widget For Blogger Last week we shared how to create a dynamic FlexSlider to display recent posts in blogger with horizontal animation. Today we will learn how to create a vertical slider to animate the list of recent posts in vertical direction. Again we will use blogger JSON Feeds to show latest posts of your blog.

Slider Features

Today's recent posts widget has some unique features introduced first time online :

  1. Author Avatar - Unique!
  2. Displays recent posts inside Dynamic Slider or as a Dynamic Flat list. - Unique!
  3. Displays recent posts from a specific category/label.
    1. Slider with two animations: Slide & Fade
    2. Clickable Comments Count
    3. Custom Date Format in ribbon fashion - Unique!
    4. Clickable Animated Featured Thumbnails - Unique!
    5. Option to increase or decrease thumbnail Resolution - Unique!
    6. Support for Third-party Images and YouTube thumbnails - Unique!
    7. Title Length is adjustable

    Add Vertical Slider To Blogger

    Follow the steps below to add the vertical slider to blogger:

    1. Go To Blogger > Template
    2. Backup your template
    3. Click "Edit HTML"
    4. Just below <head> tag paste the following JS and CSS source links:

      <script src='http://ajax.googleapis.com/ajax/libs/jquery/1/jquery.min.js' type='text/javascript'></script>
      <link href='http://fortawesome.github.io/Font-Awesome/assets/font-awesome/css/font-awesome.css' rel='stylesheet'/>
      <link href='http://fonts.googleapis.com/css?family=Oswald' rel='stylesheet' type='text/css'/>
      <link href='https://cdnjs.cloudflare.com/ajax/libs/flexslider/2.6.1/flexslider.min.css' rel='stylesheet' type='text/css'/>
      <script src='https://cdnjs.cloudflare.com/ajax/libs/flexslider/2.6.1/jquery.flexslider.min.js' type='text/javascript'></script>

      Note: Do not add JQuery, FontAwesome or Oswald links in the code above to your template if you are already using them on your site.

    5. Next search ]]></b:skin> and just above it paste the following code:

      Note: The stylesheet below is exactly the same that we shared earlier for Horizontal Slider except for the bolded blue code at bottom. If you have already added our previous slider then you just need to add the bolded blue code below and not the entire CSS code.

      <style>

      /*######### Recent Posts Slider Stylesheet #############*/

      .mbtslides-title{font-family:oswald; font-weight:normal;font-size:18px!important; border-bottom:2px solid rgb(144, 241, 40); color:#242729; width:300px;}.flexslider{ width:300px;  margin:0px; border:0;}
      .flexslider .slides {list-style-type:none; margin:0px auto 10px auto;padding:0px;} .flexslider li {color:#666; font-family:helvetica; font-size:12px; overflow:hidden; position:relative; padding-top: 10px; line-height: 1.6em;} .flexslider .flex-control-nav{list-style:none outside none;position:absolute;top:-45px;right:5px;text-align:right;height:10px}
      .flexslider .flex-control-nav li{display:inline-block;margin:0 2px}
      .flexslider .flex-control-nav a{text-indent:9999px;display:block;width:10px;cursor:pointer;height:10px;background-color:#000;border:1px solid #000;border-radius:0!important}
      .flexslider .flex-control-nav a.flex-active{background-color:rgb(132, 219, 6);border:1px solid rgb(144, 241, 40)} .flexslider .flex-div{margin:0px auto 20px auto; display:block; border-bottom:1px solid #eee; padding-bottom:20px!important; position:relative;} .flexslider li a { color:#0080ff; text-decoration:none; } .flexslider i{color:#999; padding-right:5px; } .flexslider .iline{line-height:2em; margin-top:3px;} .flexslider .icontent{line-height:1.5em; margin-top:5px;} .flexslider div span{margin:0 5px 0 0; display:inline-block;font-weight: normal; } .flexslider .mbttitle {font-family:oswald; font-size:13px; color:#666; font-weight:normal; text-decoration:none;} .flexslider .mbttitle:hover, .flexslider .itotal a:hover  {color:#333; text-decoration:none;}
      .flexslider .iedit a{text-decoration:none; color:#999; cursor:pointer}
      .flexslider .iedit:before, .flexslider .iauthor:before, .flexslider .itag:before, .flexslider .icomments:before, .flexslider .idate:before, .flexslider .itotal span:before{font-family:fontAwesome; position:relative; padding-right:8px; color:#999;} .flexslider .iauthorpic{width: 17px!important;height: 17px!important;border-radius: 50%; float: none; display: inline-block!important; margin:0px 0px 0px 0px; padding-right:3px; position:relative; top:3px;}
      .flexslider .iFeatured{overflow:hidden;position:relative;float:left;margin:0 5px 10px 0;padding:0;} .flexslider .iFeatured a {background: none; padding:0px; display: block;border:1px solid #eee;} .flexslider .iFeatured img{width:110px!important;height:65px!important;-moz-transition:all .3s;-webkit-transition:all .3s;transition:all .3s; border-radius: 2px;} .flexslider .iFeatured:hover img{ opacity:1;   -moz-transform:scale(1.4);-webkit-transform:scale(1.4);transform:scale(1.4)} .flexslider .icomments a{color:#0080ff; font-family: arial;font-size:12px;} .flexslider .icomments a:hover{text-decoration:underline} .flexslider .icomments:before {content:'\f086'; padding:0px 3px 0px 7px; color:#84DB06;} .flexslider .idate {position: absolute;left: 0px;top: -7px; background: rgb(132, 219, 6);color: #fff;padding: 3px 4px;font-family: oswald;font-size: 11px;border: 1px solid rgb(144, 241, 40);} .flexslider .idate div{width:18px; line-height:1.6em; text-align:center;}
      .flexslider .idate:after {content: ' ';position: absolute;z-index:-9999px;width: 0;height: 0;left: 25px;top: -1px;border-width: 4px 6px;border-style: solid;border-color: transparent transparent rgb(125, 208, 4)  rgb(125, 208, 4);}.flexslider .flex-div-v{margin:10px auto 20px auto; display:block; border-bottom:1px solid #eee; padding-bottom:20px!important; position:relative;}

      </style>

      Make these changes

      • To change the green color theme of the vertical slider simply replace the green highlighted color codes with color of your choice. The color can be in rgb or #hexadecimal, both work. Use our  Color Code Generator.
    6. Save your template.
    7. Now go to Blogger > Layout
    8. Select "Add a Gadget"
    9. Choose "HTML/JavaScript" gadget
    10. Keep the title field empty and then paste the following code inside it:

      <script type="text/javascript">
        $(window).load(function() {
          $('.mbt-v').flexslider({
         animation: "slide",
              directionNav: false,
             touch: true,  direction: "vertical",
             slideshowSpeed: 2500,
            pauseOnHover: true,
           animationSpeed: 700,
          });
        });
      </script>


      <h2 class="mbtslides-title">Recent Posts Slider</h2>
      <div class="flexslider mbt-v">
      <ul class="slides">

      <script type="text/javascript">
      //################### Defaults
      var ListBlogLink = "http://mybloggertricks.com";
      var ListCount = 6;
      var ListLabel = "SEO";
      var TitleCount = 66;
      var ImageSize = 150;
      //################### Function Start
      function mbtslider(json) {
      for (var i = 0; i < ListCount; i++)

      //################### Variables Declared
      var listing= ListImage = ListUrl = ListTitle = ListImage = ListContent = ListConten = ListAuthor = ListTag = ListDate = ListUpdate = ListComments = thumbUrl = TotalPosts = sk = AuthorPic= ListMonth = Y = D = M = m = YY = DD = MM = mm = TT =  "";

      //################### Category
      if (json.feed.entry[i].category != null)
      {
      for (var k = 0; k < json.feed.entry[i].category.length; k++) {
      ListTag += "<a href='"+ListBlogLink+"/search/label/"+json.feed.entry[i].category[k].term+"'>"+json.feed.entry[i].category[k].term+"</a>";
      if(k < json.feed.entry[i].category.length-1)
      { ListTag += " ";}
      }
      }

      //################### URL
      for (var j = 0; j < json.feed.entry[i].link.length; j++) {
            if (json.feed.entry[i].link[j].rel == 'alternate') {
              break;
            }
          }
      ListUrl= "'" + json.feed.entry[i].link[j].href + "'";

      //################### Info
      TotalPosts = json.feed.openSearch$totalResults.$t;
      if (json.feed.entry[i].title!= null)
      {
      ListTitle= json.feed.entry[i].title.$t.substr(0, TitleCount);
      }
      if (json.feed.entry[i].thr$total)
      {
      ListComments= "<a href='"+json.feed.entry[i].link[j].href+"#comment-form'>"+json.feed.entry[i].thr$total.$t+"</a>";
      }
      ListAuthor= json.feed.entry[i].author[0].name.$t.split(" ");
      ListAuthor=ListAuthor.slice(0, 1).join(" ");

      AuthorPic = json.feed.entry[i].author[0].gd$image.src;

      //################### Date Format

      ListMonth= ["Jan", "Feb", "Mar", "Apr", "May", "Jun", "Jul", "Aug", "Sep", "Oct", "Nov", "Dec"];

      ListDate= json.feed.entry[i].published.$t.substring(0,10);

                               Y = ListDate.substring(0, 4);
                              m = ListDate.substring(5, 7);
                               D = ListDate.substring(8, 10);
                               M = ListMonth[parseInt(m - 1)];                       

      ListUpdate= json.feed.entry[i].updated.$t.substring(0, 16);

                               YY = ListUpdate.substring(0, 4);
                              mm = ListUpdate.substring(5, 7);
                               DD = ListUpdate.substring(8, 10);
                               TT = ListUpdate.substring(11, 16);
                               MM = ListMonth[parseInt(mm - 1)];   

      //################### Thumbnail Check
      // YouTube scan

      if (json.feed.entry[i].content.$t.match(/youtube\.com.*(\?v=|\/embed\/)(.{11})/) != null)
      {

          var youtube_id = json.feed.entry[i].content.$t.match(/youtube\.com.*(\?v=|\/embed\/)(.{11})/).pop();
         
          if (youtube_id.length == 11) {
              var ListImage = "'//img.youtube.com/vi/"+youtube_id+"/0.jpg'";
              }
      }

      else if (json.feed.entry[i].media$thumbnail)
      {
      thumbUrl = json.feed.entry[i].media$thumbnail.url;
      sk= thumbUrl.replace("/s72-c/","/s"+ImageSize+"/");
      ListImage= "'" + sk.replace("?imgmax=800","") + "'";
      }

      else if (json.feed.entry[i].content.$t.match(/src=(.+?[\.jpg|\.gif|\.png]")/) != null)
      {
      // Support For 3rd Party Images
      ListImage =  json.feed.entry[i].content.$t.match(/src=(.+?[\.jpg|\.gif|\.png]")/)[1];
      }

      else
      {
      ListImage= "'https://blogger.googleusercontent.com/img/b/R29vZ2xl/AVvXsEgtm0maNUr06C_jCvhDoLUkVnptgdxcrDZZu6uXi9IGh6IreJpMcY7Vcs4HP-ynBx46v8dBcA6Lk4Jhoy0TGbObxeJt3O6fnk1iWw1OAgEOBPQZQBEosJkkxc6iVuTMKCMa70UGC7-K9Do/s200/Icon.png'";
      }

      //###################  Printing List
      var listing = "<div class='flex-div-v'><div class='iFeatured'><a  href="
      + ListUrl+
        "><img src="
      +ListImage+
      "/></a></div><a class='mbttitle' href="
      +ListUrl+
      "target='_blank'>"
      +ListTitle+
      "</a><div class='iline'><span class='iauthor'><img class='iauthorpic' src='"+AuthorPic+"'/>"
      +ListAuthor+
      "</span><span class='icomments'>"
      +ListComments +
      "</span> <span class='idate'><div>"
      + D +
      "</div><div> "
      + M +
      "</div></span></div></div>";
      if (i == 0)
      document.write('<li>');
      if (i < ListCount/2)
      document.write(listing);
      if (i == ListCount/2)
      document.write('</li><li>');
      if (i >= ListCount/2)
      document.write(listing);
      if (i == ListCount)
      document.write('</li>');
      } }

      <!-- #### Invoking the Callback Function #### -->

      document.write("<script src='"+ListBlogLink+"/feeds/posts/default/-/"+ListLabel+"?alt=json-in-script&callback=mbtslider'></"+"script>");
      </script>
      </ul></div>

      Changing the control options:

      • The customization steps for this slider are exactly the same that we discussed in step#10 of Horizontal FlexSlider. Please read it for understanding how to modify the widget.
    11. Click Save and you are all done!

    How To Display Dynamic Slider or a Flat List?

    You can choose whether to display posts inside animated FlexSlider or display them as simple flat vertical list. In other words you can choose to enable or disable the FlexSlider.

    How to enable or disable the flex slider?

    If you want to display and enable FlexSlider then insert even integer value next to ListCount , such as 2,4,6,8 etc.

    Output:

    Vertical Slider For Blogspot

    For displaying a dynamic Flat list without animation slides or in other words to disable FlexSlider insert odd integer value next to, such as 1,3,5,7 etc.

    Output:

    Vertical Slider For Blogger Blogs

    Need Help?

    Let me know if you have any questions or if you need any assistance. We are done with both horizontal and vertical slider widgets for blogger and now we will move towards more advanced and useful widgets such as carousels, newstickers, related posts, random posts and so on. Stay tuned for a lot of fun. =)

    Blogger: Sitemaps Wrongly Sorted & Causes Indexing Delay

    Around Feb, 2015 we announced that blogger creates a dynamic sitemap.xml file for all blogspot blogs and you don't need to submit your RSS or Atom Feed links to Google Search Console  anymore. Later we discovered that this sitemap file created only 20 nested pages where each nested page linked 150 blog posts so in total this sitemap would submit only 3000 posts to search engines. For blogs which had more than 3000 posts published this was a problem. To counter this issue we introduced Blogger Sitemap Generator tool that helped you to create remaining sitemap.xml nested pages.

    blogger sitemap.xml causing indexing delay

    Just this week blogger has fixed this issue permanently and now blogspot sitemap.xml file will dynamically create nested pages for all your blog posts inside the sitemap index. Which means whether you have over 3000 posts or less than 3000 posts published, Blogger will include them all in the sitemap.xml index list.

    You no longer need to manually submit sitemap.xml?page=21+ pages. See the pic below for illustration

    blogger sitemap.xml wrongly sorted

    Now submitting a single sitemap.xml file will submit all your blog posts to Google search console and Bing webmasters tool. No need to manually submit nested pages as shown in the image below.

    Sitemaps Are Wrongly Sorted and Causes Indexing Delay

    I observed a new change which though seems weird again.

    Blogger parent sitemap.xml file has the following nested pages in its sitemapindex:

    http://www.mybloggertricks.com/sitemap.xml?page=1

    http://www.mybloggertricks.com/sitemap.xml?page=2

    http://www.mybloggertricks.com/sitemap.xml?page=3

    http://www.mybloggertricks.com/sitemap.xml?page=4

    http://www.mybloggertricks.com/sitemap.xml?page=5

    http://www.mybloggertricks.com/sitemap.xml?page=6

    http://www.mybloggertricks.com/sitemap.xml?page=7

    http://www.mybloggertricks.com/sitemap.xml?page=8

    http://www.mybloggertricks.com/sitemap.xml?page=9

    http://www.mybloggertricks.com/sitemap.xml?page=10

    The latest posts (recent 150 posts) are added in sitemap page=1 and oldest posts are added inside page=10. In short the sitemap Index is designed in such a way that latest posts are added at top and oldest at bottom, sorted by date and post count of 150 accordingly.

    One problem that this method causes is that it will increase the work load on Google search console. Because each time you publish a new post, the arrangement of links inside all your sitemap pages will change. Because the oldest post inside page=1 will be replaced by the newest at top, thus pushing the oldest post to page=2. Since a new post is added inside page=2, so page=2 will have to push its oldest post to page=3 and thus the cycle continues, causing a wave of change on all nested pages.

    Because of this poor sorting of links in the sitemap index, I observed that Google is indexing our latest posts very slow. Now new posts does not appear in SERPs for over 24 hours unless we manually submit it. This happens because each of the sitemap nested page goes through an update which forces Google to re-index all sitemap pages again, thus wasting precious time of Google.

    Update: Surprisingly our posts are now indexed without any delay within minutes of getting them published. But I will still recommend this fix to Blogger team.

    Blogger Team Must Fix The Sitemap.xml Link Sorting Issue

    I would request blogger team to fix this links sorting issue and instead allow new links to be added inside a separate nested page if in case the last nested page is full or contains 150 links. Links inside Sitemap pages must not be replaced with a newer entry and the arrangement must exist without going through any change. Replacement of links inside nested pages is seriously causing indexing delay at Google search console and effecting our organic traffic.

    Please raise this issue at official Blogger Help Forum and inform the blogger team to fix this link sorting issue as soon as possible.

    Are you experiencing similar problems at Google search console? Are your latest posts getting indexed normally or with a significant delay? Are your experiencing a delay in your blog search index rate? Do share your concerns with us.